
On-boarding your partners effectively is critical to the success of your channel partner program. An effective on-boarding process is one that spans the entire lifetime of your relationship with your channel partners, not just the first few weeks. As such, you need a way to on-board your partners in stages – from the very first touch point continuously all the way through to a mature and revenue contributing partner.
With Channelyze you can automate the entire process through template driven vendor and partner tasks to ensure that no step in your partner’s onboarding process is neglected or forgotten.
To get started, you first need to create an on-boarding template. This is a set of tasks with various start times and deadlines, which will be created for each new partner that you on-board. You can create different on-boarding templates for different partner types. So for instance, you would likely have a different strategy for on-boarding value added resellers compared to on-boarding distributors.
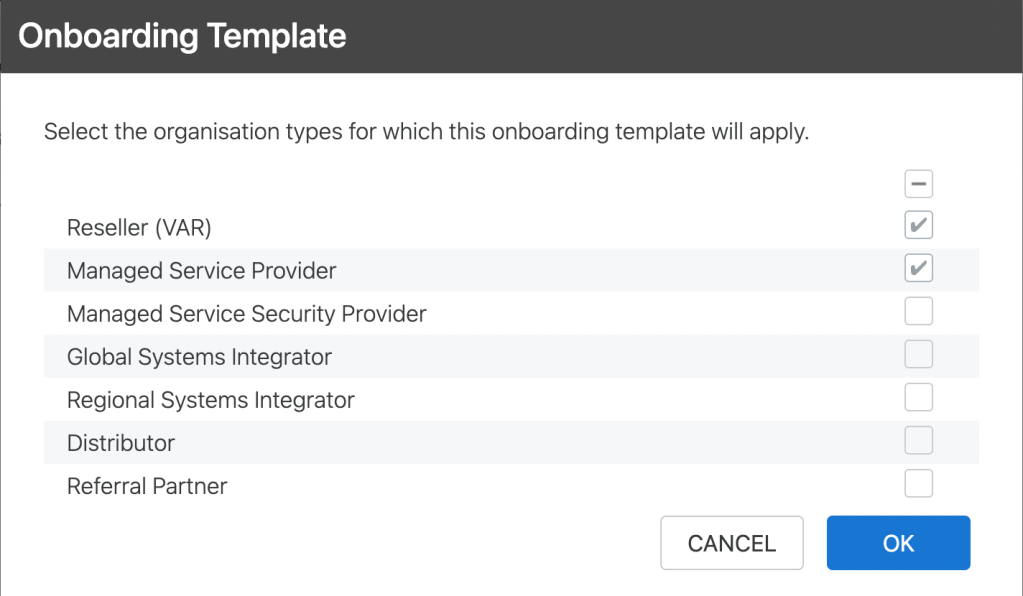
You can create an on-boarding template by selecting Partner Resources from the Partners menu and clicking on On-boarding Templates. Press the New Template button and choose the partner types that you want the template to be associated with.
When you press OK, you’ll see an almost blank screen. The first step is to create the stages associated with the template. When you on-board a partner, their on-boarding experience is broken down into a set of stages, which you decide upon. For example, you may have a Welcome stage, where you send them a welcome email and invite them to an on-boarding introductory call. Then you might have a Getting Started stage where they might be expected to complete a business plan and start familiarising themselves with your product by watching an overview video. Next you might have an execution stage, during which business plans are agreed and partnership agreements are signed.
Finally, you might have one or two further stages that cover product knowledge and see them through their first few sales. On-boarding never really ends if you think of it as the process to carefully manage your relationship.
You can start adding these stages by clicking in the Create New Stage box and typing the name of the stage and pressing Enter. Repeat for each stage, re-ordering the stages by dragging them, if necessary.

To add a task under a stage, click in the box titled “Create a new task”, enter a name for the task and press Enter. A basic To do task is created. To further configure the task, click the task to show the Task Template dialog.
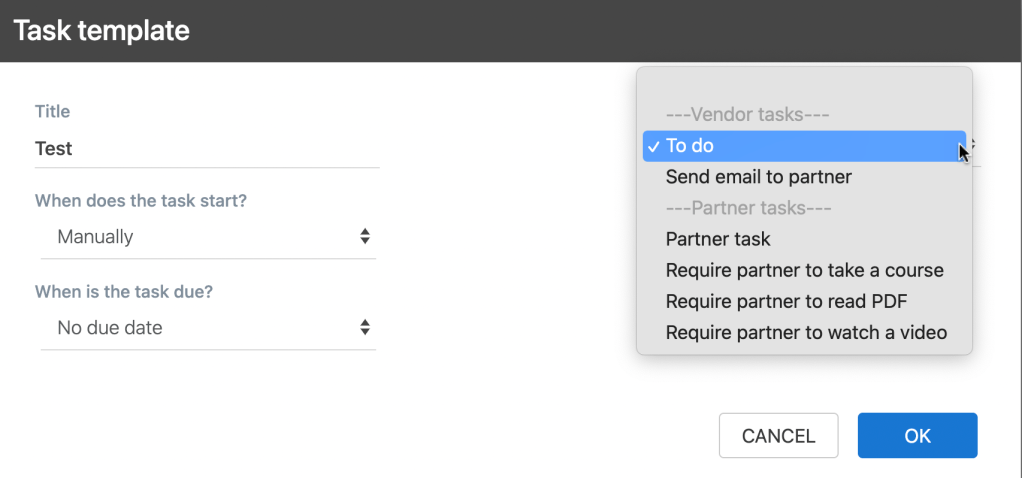
From the dropdown field at the top right of the dialog, you can choose the task type. The table below shows the types of task you can choose from and a description for each.
| Task type | Description |
|---|---|
| To do | A simple task that shows to you, the vendor. |
| Send email to partner | When this task is started, it sends an email to the partner (with subject and body that you can specify). |
| Partner task | A task that shows to the partner once the task has been started. You can specify the name of the task that the vendor sees by specifying the text in the Partner Task Title field. You can also include instructions for the partner for the task by entering text into the Instructions for Partner field. |
| Require partner to take a course | Lets you specify a learning course that the partner must enrol in, before they can mark the task as complete. |
| Require partner to read PDF | Lets you specify a PDF document that the partner must read fully before they can mark the task as complete. |
| Require partner to watch video | Lets you specify a video that the partner must watch fully before they can mark the task as complete. |
By default, tasks should be started manually, but they can optionally start automatically after a period of time after on-boarding started or after the previous stage completed. When a task is started, you will see it highlighted with a blue color (an unstarted task is highlighted grey). Partner tasks only become visible to partners once the task is started, ensuring that partners are not bombarded with tasks across the entire on-boarding process and are only presented with tasks to complete at the appropriate time.
You can optionally give a task a due date. This is useful for being able to see, at a glance, when tasks have become overdue. Overdue tasks will be highlighted with a red colour during the on-boarding process. The due date of a task may be specified to be a certain period after the task has started or after the on-boarding process started.
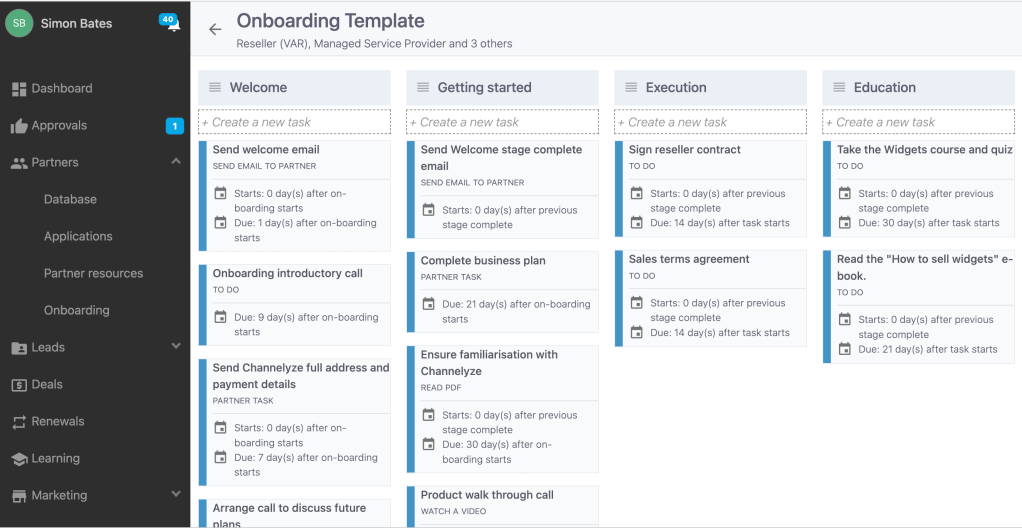
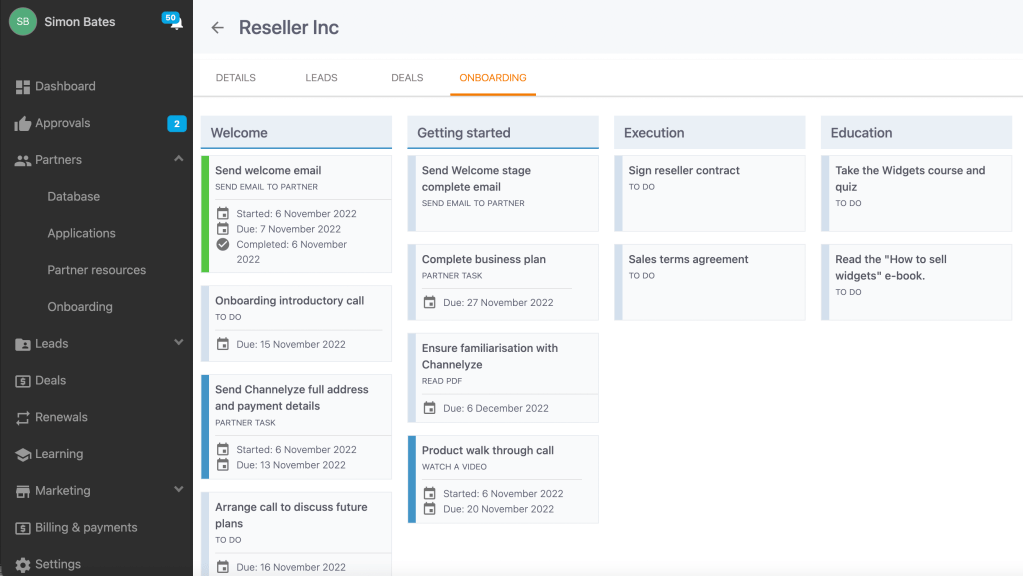
Once you have added task templates for each stage, your template will look something similar to below:
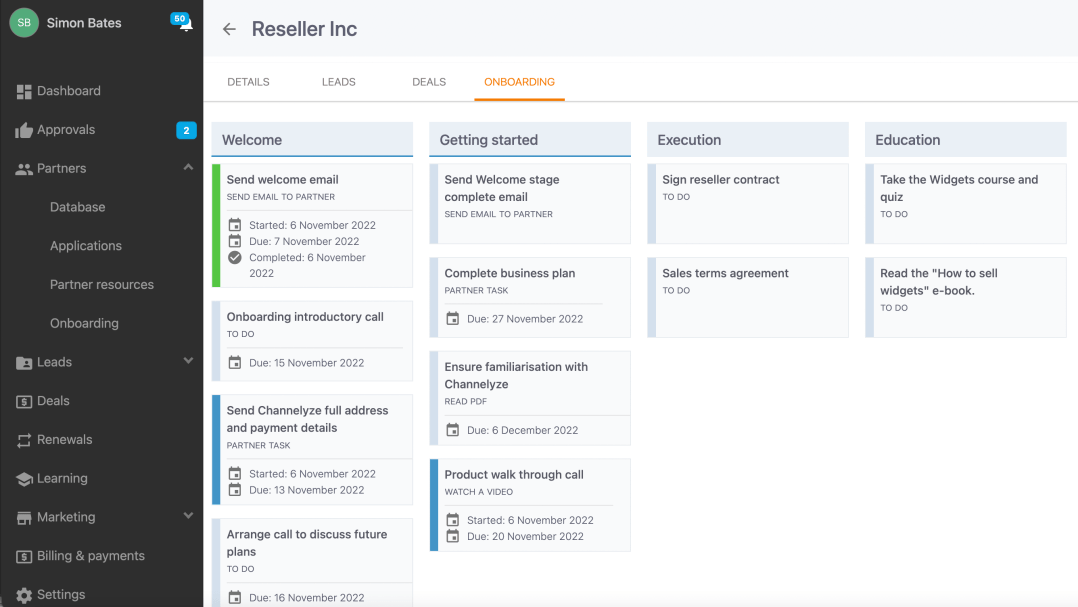
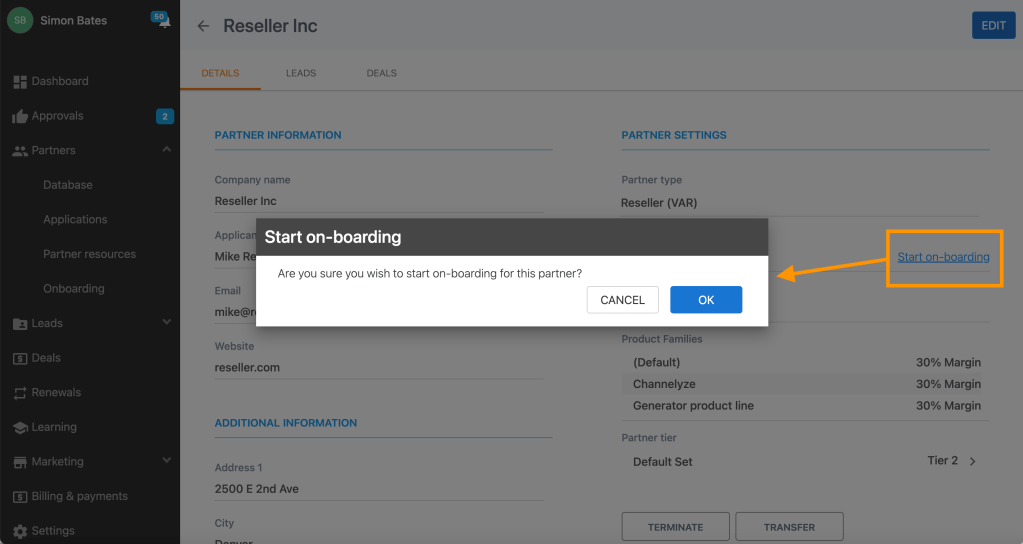
You are now ready to enrol your partners into the onboarding process. Open the relevant partner record from the Database page and click on the Start onboarding link.
A set of tasks will be created from the task templates we just created and will be visible in the Onboarding tab of the partner page.
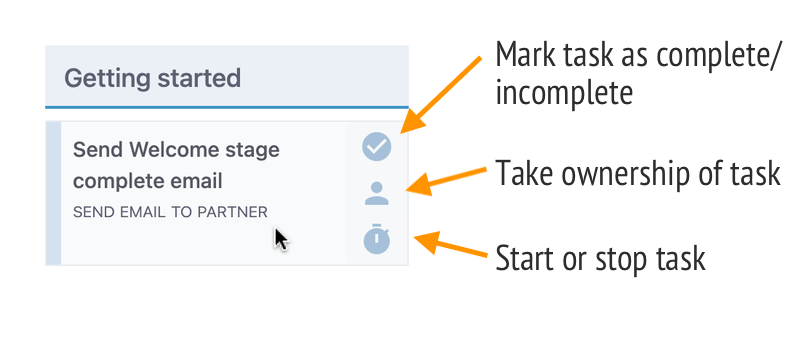
You can stop and start tasks and mark them as complete by clicking the relevant button that shows when you hover the mouse over a task.
You can start or stop tasks. Starting a partner task makes the task visible to the partner.
You can also take ownership of a task to give clarity to other users as to who is looking after this particular onboarding task for the partner.
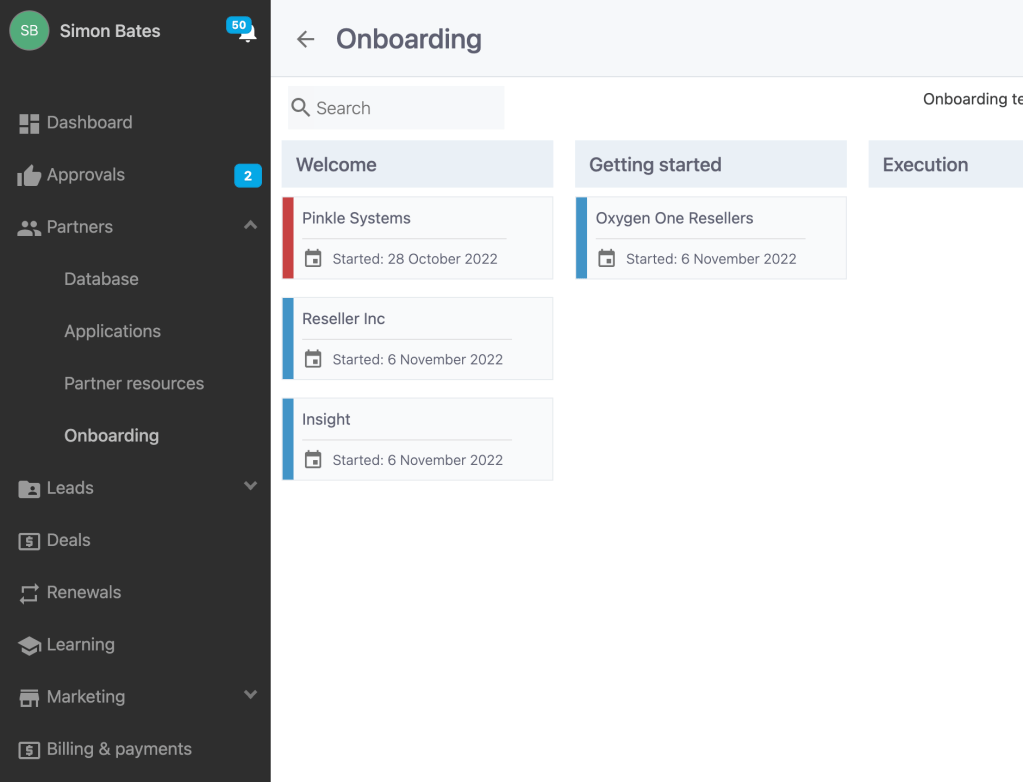
When you have a number of partners enrolled, a useful view is the overall Onboarding view, which shows the progress of onboarding by showing partner by stage. The view also highlights the partner entry according to the status of the partner’s onboarding.
To find out more about Channelyze and how it could work in your organization, schedule a discovery session with us at https://channelyze.io/request-live-demo.html.
